Oracle VirtualBox is an Open source cross platform virtualization software. It works on all platforms such as Windows, Linux, Mac and Solaris and supports unlimited guest operating systems. You can run Windows and Linux on Mac or Windows and Linux on Solaris or Solaris on Windows, Linux and Mac. For more information visit the official website.
Install Oracle Virtual Box on Linux mint 14 / Ubuntu 12.10:
Method 1:
Open the Terminal by pressing the CTRL+ALT+R and enter the below mentioned command:
$ wget -q http://download.virtualbox.org/virtualbox/debian/oracle_vbox.asc -O- | sudo apt-key add -
Add the Repository "deb http://download.virtualbox.org/virtualbox/debian precise contrib" (Enter without Quotes) in the sources list i.e /etc/apt/sources.list.

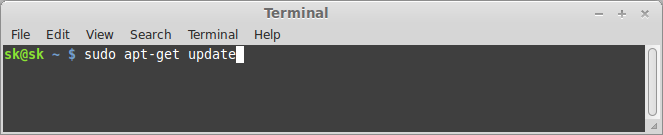
Now update the source list:
$ sudo apt-get update and press Enter:
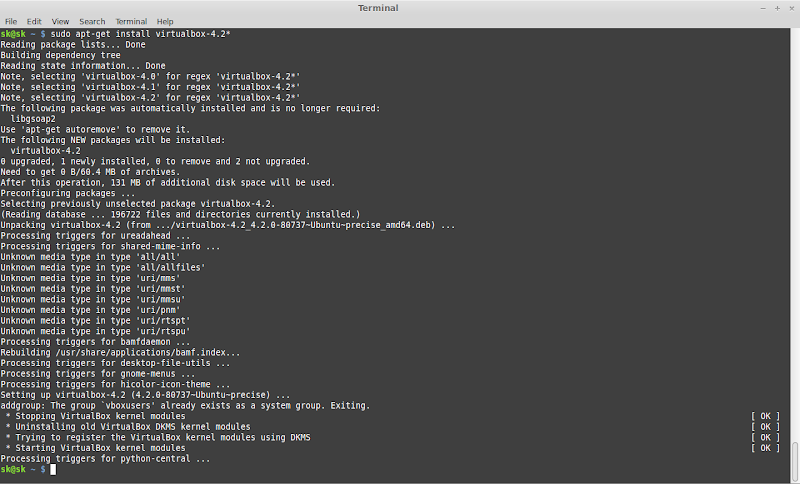
Then install Oracle Virtual Box:
$ sudo apt-get install virtualbox-4.2* and press Enter:
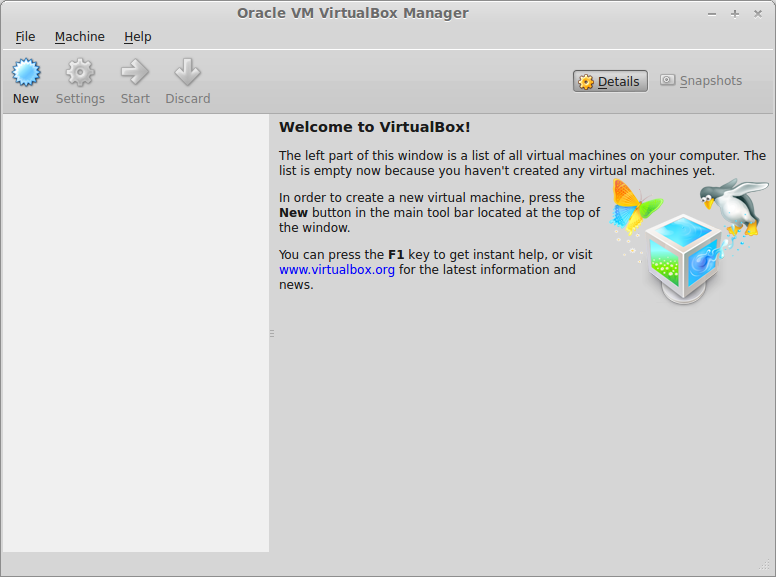
Thats it. Open the Oracle Virtual Box. The Main window should looks like below:
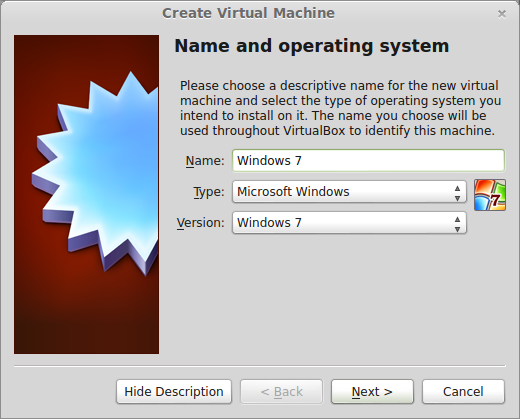
Create a Windows 7 Virtual Machine:
Click the New button to add a New Virtual Machine:
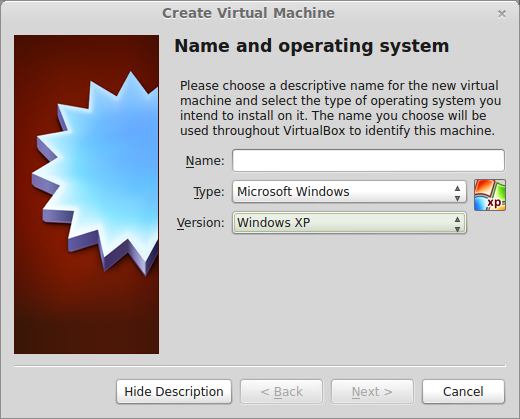
Enter the name of the Operating System. In our example its Windows 7 and click Next:
Enter the MEMORY size to be allocated to the Virtual machine and click Next:

Create the Hard disk to this Virtual Machine and click create:

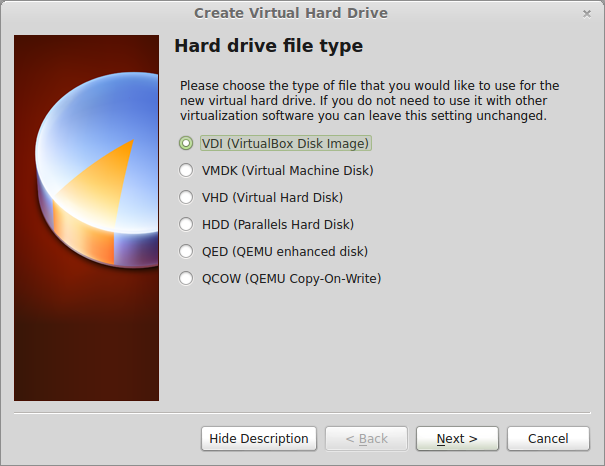
Enter the Hard drive type and Press Next. For more information to learn about Virtual Hard drive type please check this link. If you don't know which type to select, leave as its default selection.Enter the MEMORY size to be allocated to the Virtual machine and click Next
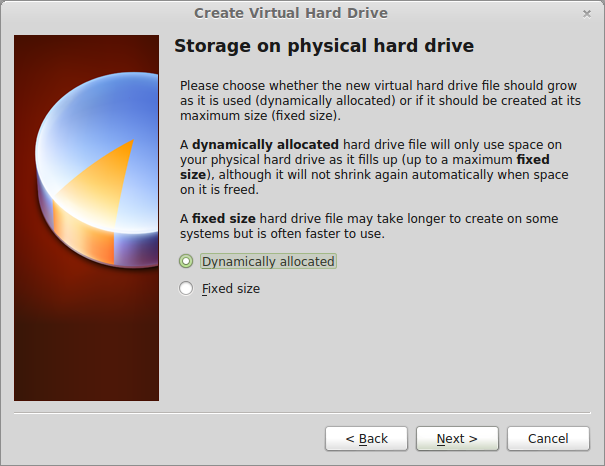
Choose whether the virtual hard disk should be in dynamically allocated or remain in the fixed size and click Next:
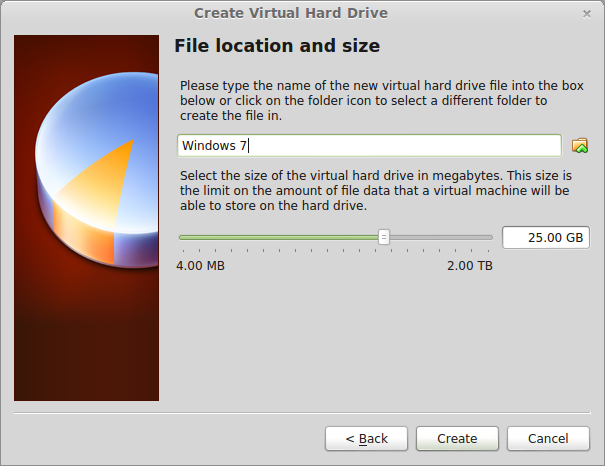
Enter Virtual hard disk size and press Create:
Now the Virtual machine is created:

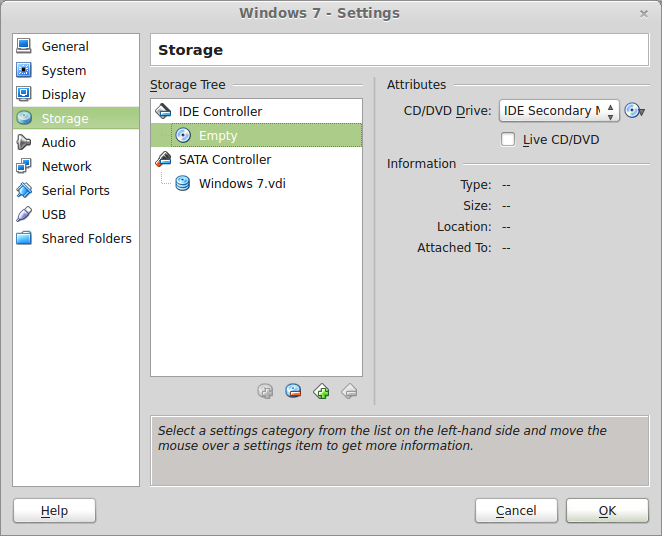
Now we should mount the Operating System DVD or ISO to install Virtual system. Click Settings and click Storage. This section shows you two controllers; One is IDE Controller and another one is SATA Controller. You can mount the CD/DVD or ISO to any one of the controllers. Let us add the ISO in the IDE Controller now.
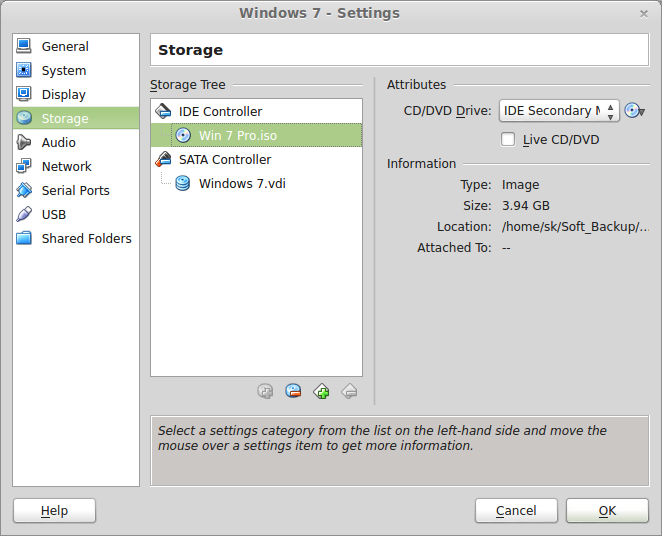
Click the CD/DVD drive drop-down box and select "Choose a Virtual CD/DVD file". Select the Windows 7 ISO from your host hard drive or you can select the Operating system DVD in your Host CD/DVD Drive directly:

Now the ISO is mounted in the IDE Controller. Click OK to close this window:
Now click the Start button in the main window. The Guest OS will begin the installation:
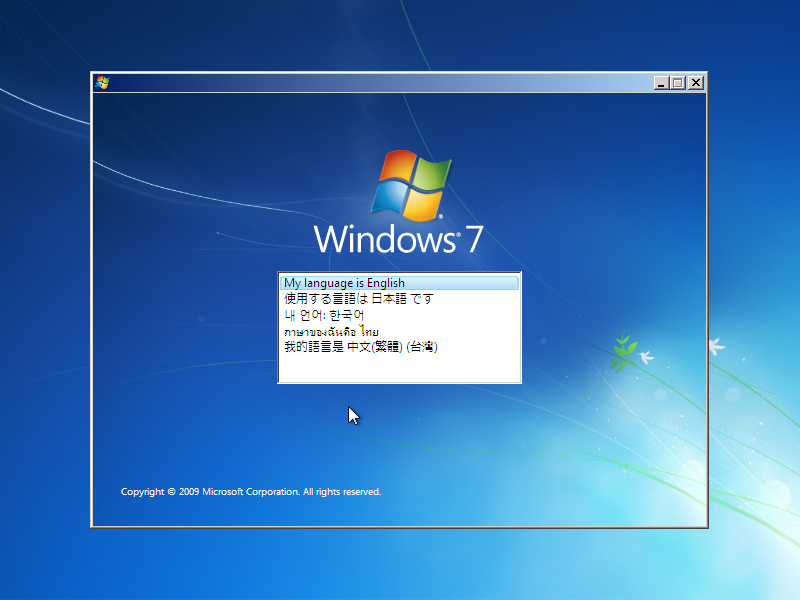
Thats it. Continue the installation as the way you do in the physical machine. Enjoy!!!