Table of Contents
About VSFTPD
VSFTPD, stands for Very Secure File Transfer Protocol Daemon, is an open source, lightweight, stable, most secure, and fastest FTP server for Unix and Linux operating systems. Some popular FTP sites for Debian, FreeBSD, RED HAT, SUSE, Kernel, KDE, GENOME etc., are powered by VSFTPD. It is the default FTP server for most Linux and Unix operating systems such as Red Hat, CentOS, Fedora, and Ubuntu. It supports IPv6, and SSL. So, you can setup a secure FTP server for your organization using VSFTPD. It is licensed under GPL, and is completely free.
In this tutorial, we will see how to install VSFTPD server in Ubuntu 16.04 LTS. This method should also work on other Ubuntu derivatives, Debian, and its derivatives.
Install VSFTPD
VSFTPD is available in the default repositories.
To install VSFTPD, run the following command from your Terminal:
sudo apt-get install vsftpd
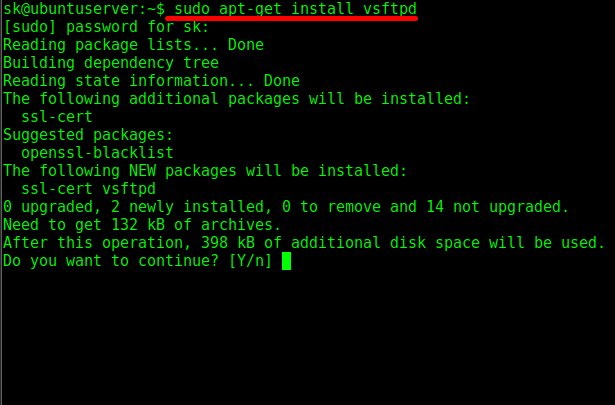
Install vsftpd
VSFTPD has been installed. Let us go ahead and configure. It's very simple.
Configure VSFTPD
Edit /etc/vsftpd.conf file:
sudo nano /etc/vsftpd.conf
Find and change the following lines as shown below.
[...]
##Disable anonymous user login.
anonymous_enable=NO

##Uncomment these two lines.
ascii_upload_enable=YES
ascii_download_enable=YES

##Uncomment and enter your Welcome message - Not necessary, It's optional.
ftpd_banner=Welcome to OSTechNix FTP service.

##Add this line the end.
use_localtime=YES
Save and close the file. Restart vsftpd service to take effect the changes.
sudo systemctl restart vsftpd
Or
sudo service vsftpd restart
Check if vsftpd service is running or not using command:
sudo systemctl status vsftpd
Sample output:
● vsftpd.service - vsftpd FTP server
 Loaded: loaded (/lib/systemd/system/vsftpd.service; enabled; vend
 Active: active (running) since Thu 2016-06-09 17:28:31 IST; 31s a
 Process: 2040 ExecStartPre=/bin/mkdir -p /var/run/vsftpd/empty (co
 Main PID: 2043 (vsftpd)
 Tasks: 1
 Memory: 392.0K
 CPU: 83ms
 CGroup: /system.slice/vsftpd.service
 └─2043 /usr/sbin/vsftpd /etc/vsftpd.conf

Jun 09 17:28:31 ubuntuserver systemd[1]: Starting vsftpd FTP server.
Jun 09 17:28:31 ubuntuserver systemd[1]: Started vsftpd FTP server.
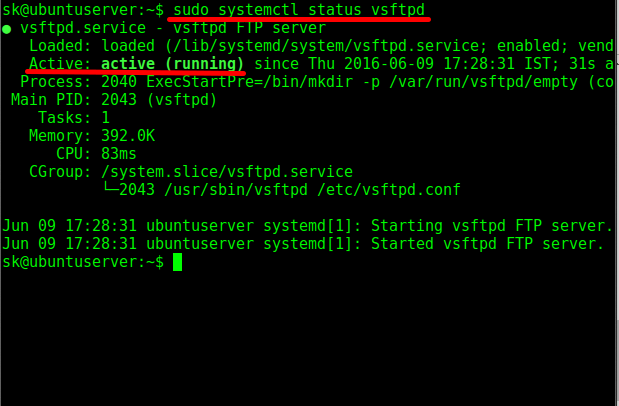
vsftpd service status
As you see in the above result, vsftpd service is running.
Configuration part is over. Next, we need to create a some FTP users.
Create FTP users
You shouldn't allow enable ftp access for root user. It is insecure and dangerous fro your production server. So, Just create a normal user.
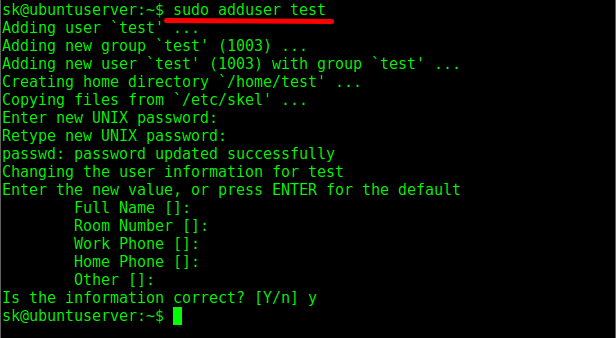
Let us create an user called "test".
To do so, run:
sudo adduser test
Enter the password twice and other details.
Sample output:
Adding user `test' ...
Adding new group `test' (1003) ...
Adding new user `test' (1003) with group `test' ...
Creating home directory `/home/test' ...
Copying files from `/etc/skel' ...
Enter new UNIX password:
Retype new UNIX password:
passwd: password updated successfully
Changing the user information for test
Enter the new value, or press ENTER for the default
 Full Name []:
 Room Number []:
 Work Phone []:
 Home Phone []:
 Other []:
Is the information correct? [Y/n] y
Create FTP users
Similarly, Create as many as you wanted and set password for them.
Access FTP server
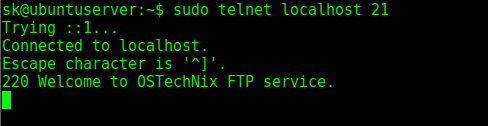
Let us check if our VSFTPD server is working from the server itself.
To do so, run the following command from the Terminal:
sudo telnet localhost 21
Sample output:
Trying ::1...
Connected to localhost.
Escape character is '^]'.
220 Welcome to OSTechNix FTP service.
Test FTP server locally
Success! We can able to access the FTP server locally. To exit from FTP console, just type: quit.
Let us try to access it from any remote system. Go to the remote system, and open up the Terminal, and access the FTP server as shown below.
ftp 192.168.43.2
Here, 192.168.43.2 is my FTP server's IP address.
Enter the FTP server's username and password:
Connected to 192.168.43.2.
220 Welcome to OSTechNix FTP service.
Name (192.168.43.2:sk): test
331 Please specify the password.
Password:
230 Login successful.
Remote system type is UNIX.
Using binary mode to transfer files.
ftp>
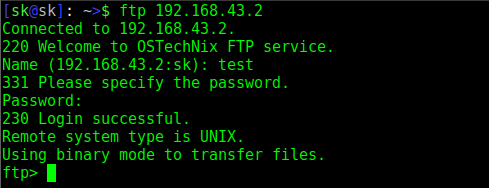
Log in to FTP server
To exit from FTP console, type: quit.
Some of you might not access the FTP server from a remote system, and got an error message like below.
“Could not connect to server.”
To fix this issue, allow the ftp service via UFW firewall as shown below.
sudo ufw allow ftp
Now, try again to access the FTP server. It should work now.
Access FTP server using FileZilla
Not everyone is command-line ninja. Someone might want to access FTP server using any graphical clients. There are many GUI FTP clients available. One of the popular FTP client application is FileZilla.
To install FileZilla in any DEB based systems, run:
sudo apt-get install filezilla
After installing FileZilla in your client system, open it and enter your FTP server IP address, FTP username and password, and click Quick Connect.
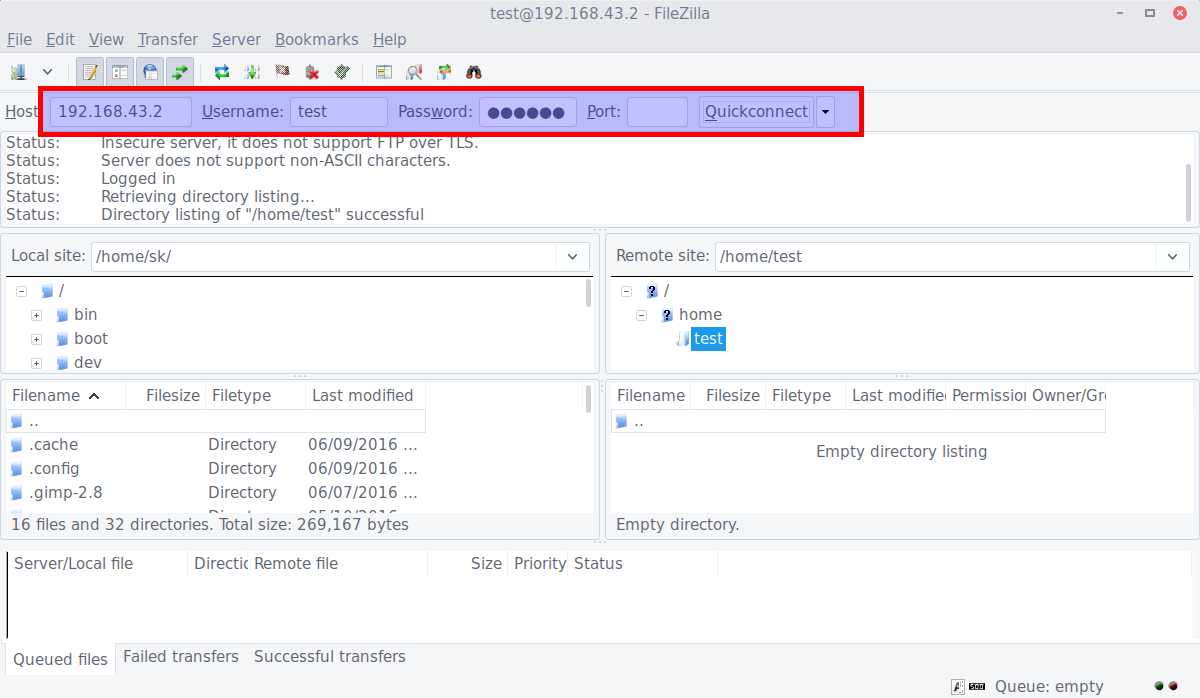
FileZilla in action
Bingo! Now, upload or download files and folders to your FTP server from your client systems.
Access FTP server via a Web browser
Open up your Web browser, and navigate to URL: ftp://ftp-server-ip/. You should see a screen like below. Enter the FTP username and password, and click Login.
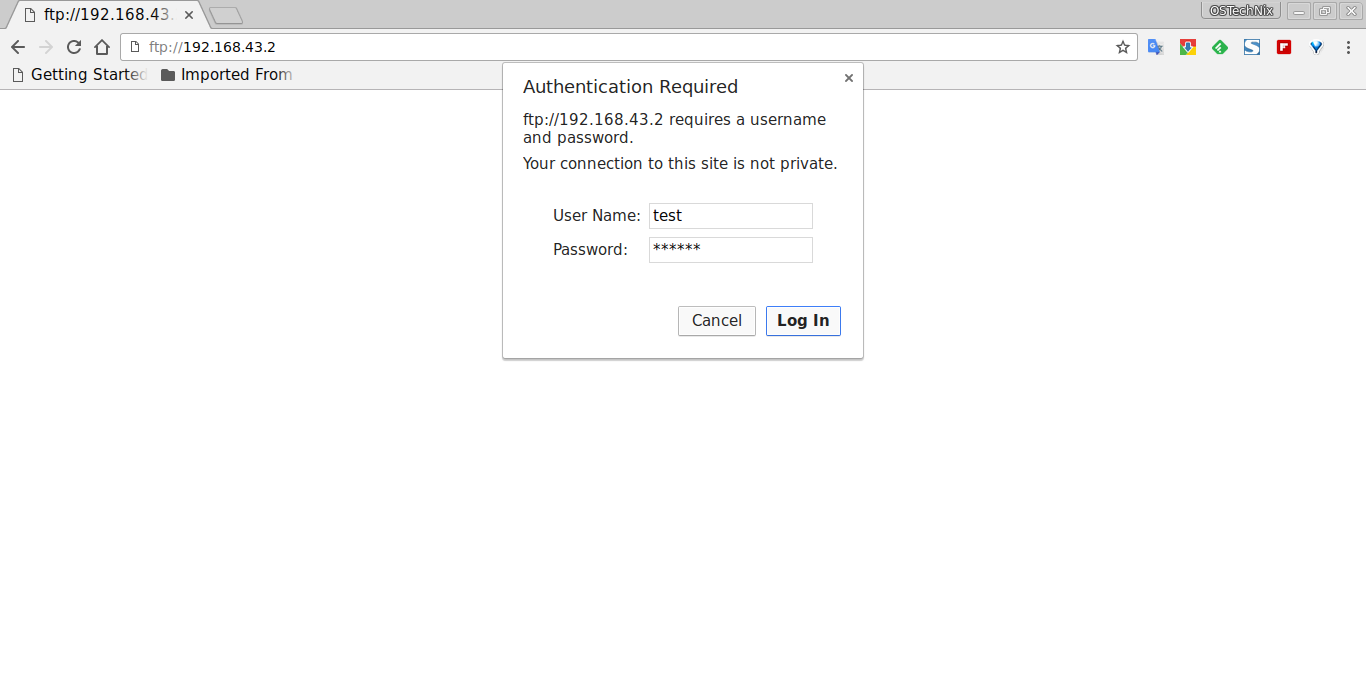
Login to FTP server
You can now download or view the FTP server's contents.
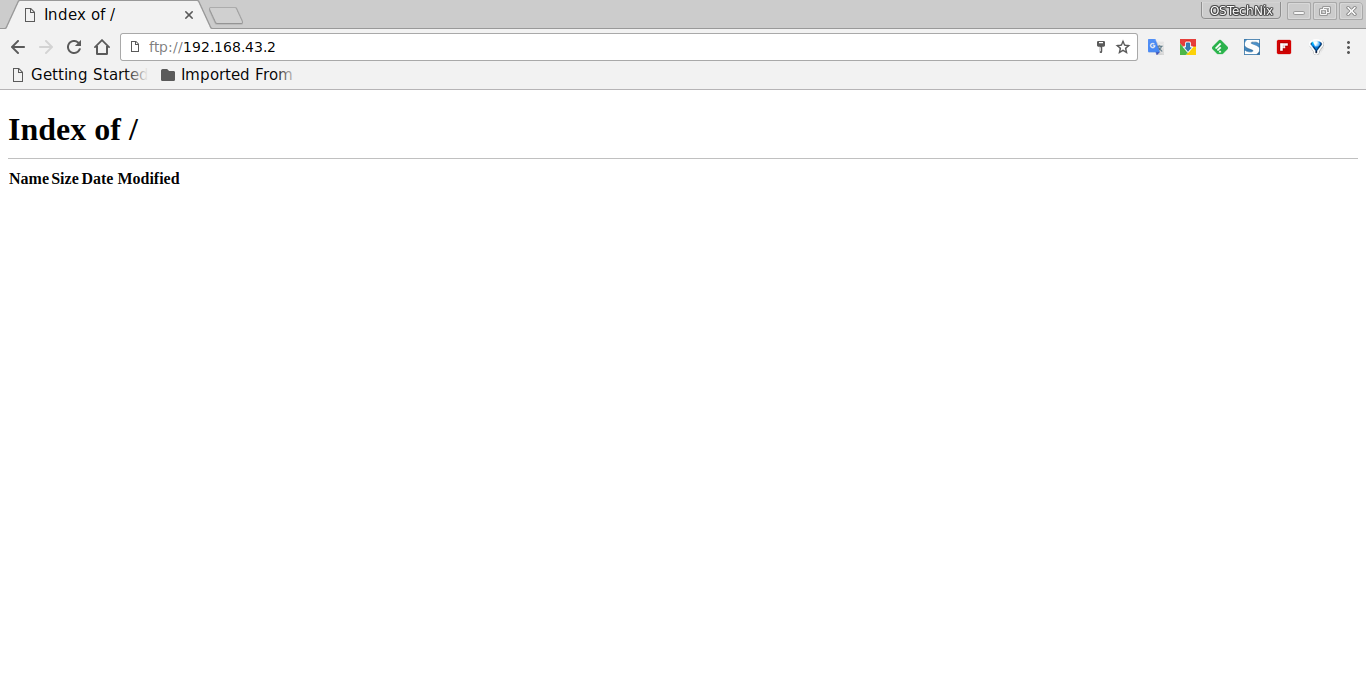
FTP server contents
Since I didn't upload any data to my FTP server yet, it just displays the blank page.
Alternatively, you can mention the ftp username in the URL itself like: ftp://username@FTP-Server-IP-Address/. And then, enter the password of the FTP user.
That's all for now. Our FTP server is ready to use. Hope this helps.
If you find this guide useful, please share it on your social networks and support OSTechNix.
To setup FTP server on CentOS, RHEL, Scientific Linux, and Fedora refer the following link.
Cheers!
Reference link:
4 comments
You might want to include a note about firewalls. At the step labeled “Access FTP server”, where you optimistically assume “Success!”, I had another experience: “Could not connect to server.” Fortunately, I was able to recognize this as a need to add a rule to my ufw firewall:
> sudo ufw allow ftp
I’m now a happy FTPer!!
Well, mostly…I was hoping you would also include how to set up SFTP.
Thanks for the comment. I have now added the firewall note. And, of course I will post an article about SFTP server.
I’m getting “Permission Denied” when trying to upload an image. I assume I need to chmod the users directory?
ah ok, might want to add this step:
# Uncomment this to enable any form of FTP write command.
write_enable=YES