Howdy! How is your weekend? Today, we will show you how to install Antergos, an Arch based distribution that comes with a graphical installer to make the installation much easier for newbies. Antergos is opt for those who wanted to get hands on with Arch based Linux distributions. It is originally released with name Cinnarch, combining with Cinnamon desktop environment, and then the name was changed as Anterogs, and now it extended its support for multiple DEs including GNOME, Cinnamon, KDE, MATE, openbox, and XFCE. Antergos is modern, beautiful operating system built-on top of Arch Linux with simplicity in mind.
We have already published few articles about Arch Linux in this blog. You can check them all in the link given below.
Let us get started.
Table of Contents
Downloading and installing Antegos
Download the latest Antergos version form the link given below.
Once you downloaded it, make a bootable media or bootable usb drive as described in the following link.
Boot your system with the bootable DVD or USB drive. You will be pleased with following screen.
Select "Start Antergos Live" to boot into the live session.

Here it is how Antergos live session looks like. Navigate through the system if you wanted to have a brief clarification about Antergos before installing it on your hard drive.
Once you are happy, click the Cnchi installer wizard icon on the left bar of the dashboard.

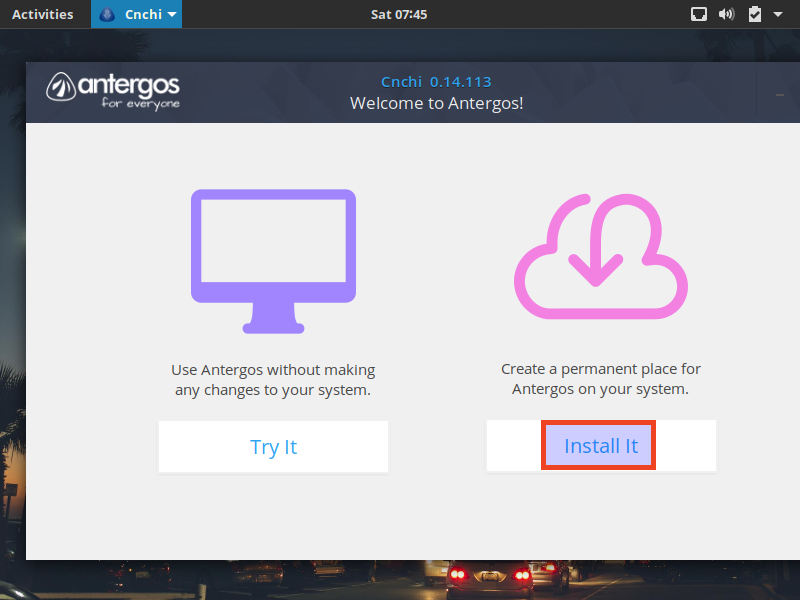
In the next screen, click "Install it" button to start installing Antergos on your hard drive.
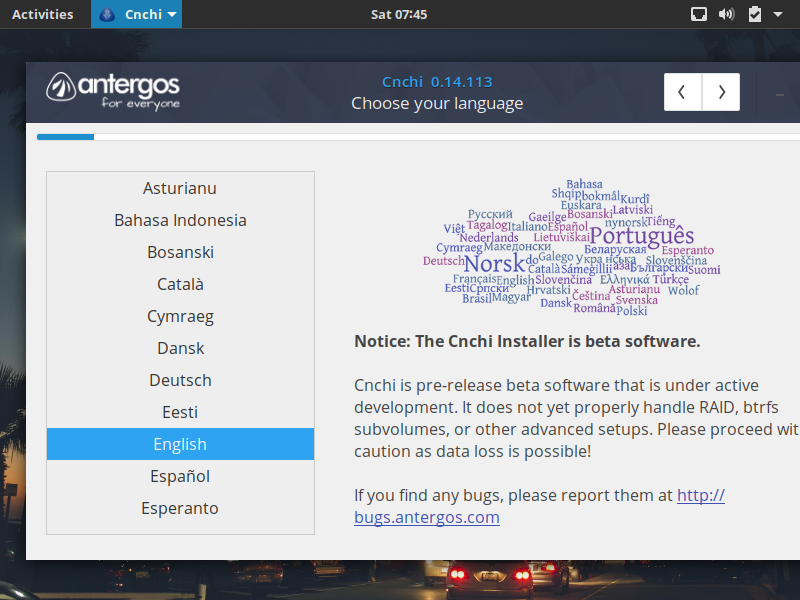
Select the installer language, and click the forward (forward arrow on the top right corner of the installer window). I prefer English, so I selected it.
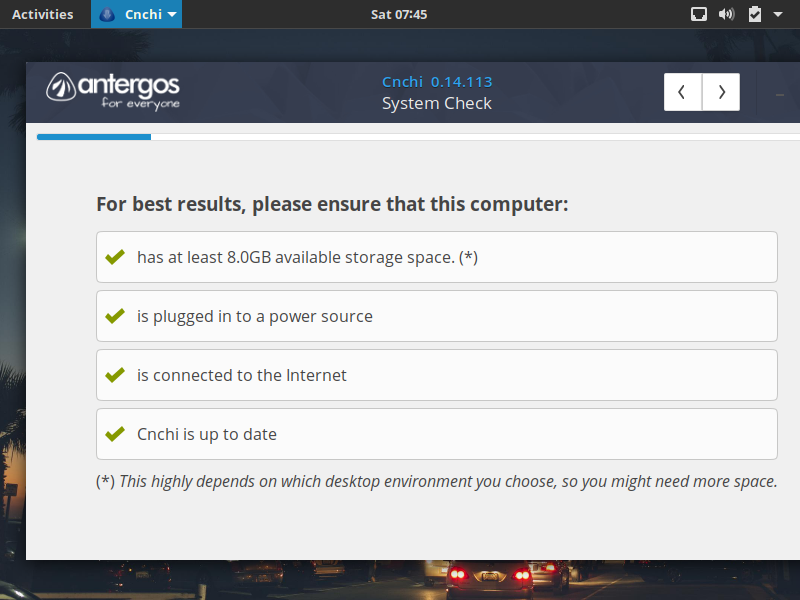
The installer will check a small review about your computer, like whether the system has enough hard drive space, has connected to the power source, has connected to the Internet and so on.
Click forward button to continue.
Select the system locale.

Select your timezone. If your system is connected to the Internet, the timezone will be automatically selected. Please note that your system must be connected to the Internet to fetching and installing latest software while installing Antergos.

Select your Keyboard layout.

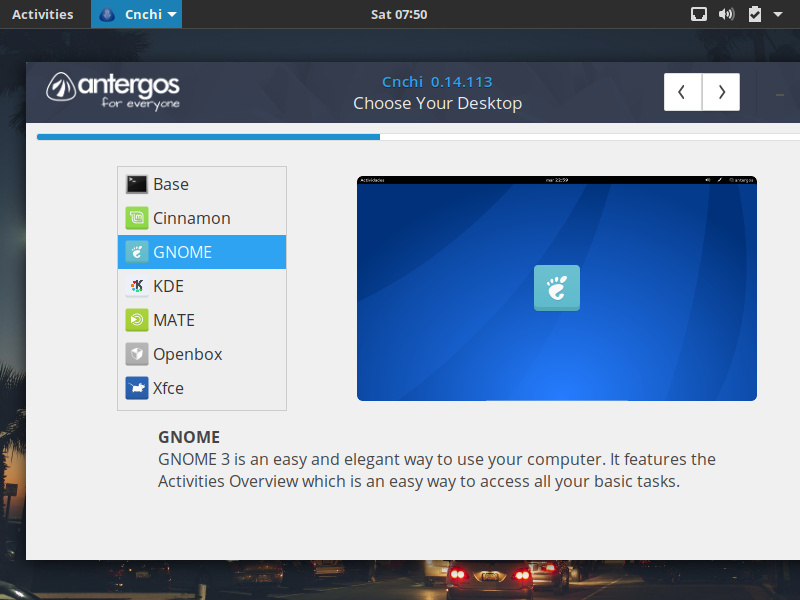
Next choose your desired Desktop environment. The default DE is GNOME. You can choose any DE of your liking listed in the installer screen.
Choose additional features like enabling AUR support, bluetooth support, and installing flash plugins etc. Then, click the forward button to continue.

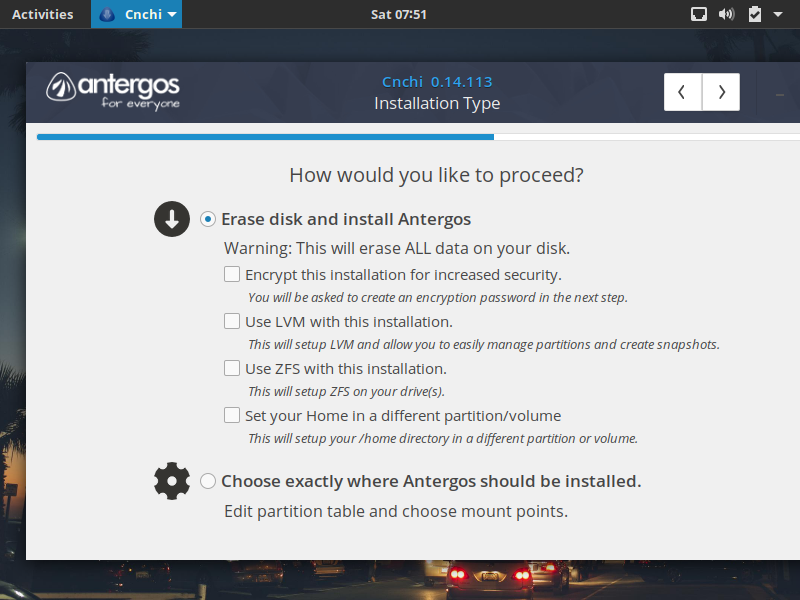
Here comes the important part. How would like to your your hard drive? Select whether you want to erase the entire hard drive and install Antergos, or manually partition the drive, and install the OS. Since, It is my fresh installation I go with the first option i.e "Erase disk and install Antergos".
Select the hard drive where you want to install the OS. If you have more than one hard drive, you need to select the correct disk to install Antergos.
I have only one drive, so I just clicked the forward button.

Review the installation summary. Once you are happy with it, just click the forward button to continue installation. Else, go back and change the settings as your liking.

Click Yes to continue the installation.

Create a default system user account.

Now, Antergos installation will start. This will take few minutes to hours depending upon the Internet connectivity speed.

Finally, click Yes to complete the installation and restart the system.

First impressions
After rebooting the system, click the user account and enter the password to log in to newly installed Antergos system.

Here it is the default look of the Antergos with GNOME desktop.

Hit the Super key or click on Activities on the top panel to display the Antergos installed applications.

As you can see, the dashboard is really cool and tidy. All applications are neatly arranged and organized. To search for a specific application, you need to enter its name on the Search on the top of the Menu dashboard.
Also, the Gnome Terminal is simple.

So, what about the default softwares? Antergos ships with minimal set of applications by default, including a web browser, audio, video players, file manager, and some more. However, you can install any software either from the command line or using the pamac, a simple graphical front-end interface for pacman.

Pamac will automatically displays whenever a new update is available.
I must mention the elegance of Antergos. It's simply superb. Antergos team includes exclusive desktop and icon themes from Numix project. The Numix has offered a cool set of icons and GTK themes to Antergos, so it gives a pleasant experience while working with AntergosAlso

I didn't find any glitches while surfing the Internet using Chromium, an open source version of Google Chrome. All went really fine.

Conclusion
To summing up, Antergos testing went fine. It recognized all hardware in the first try, and worked just fine out of the box. Antergos developers have simplified the Arch installation with a graphical installer. Also, the have tweaked the installer script and added some additional features like adding AUR support while installing it. For those who are searching for a simple, beautiful Arch based desktop, Antergos is worth to try.
That's all for today folks. Have a happy weekend!
Cheers!!
Thanks for stopping by!
How can I benefit from this blog:
- Subscribe to our Email Newsletter : Sign Up Now
- Download free E-Books and Videos : OSTechNix on TradePub
- Connect with us: Facebook | Twitter | Google Plus | LinkedIn | RSS feeds
Have a Good day!!
2 comments
Please correct the typos… I understand you are committed to making Linux more popular, but with “Antorgos” “pacmac” etc. glitches it’s quite a difficult task.
Otherwise, great article. Gonna give it a try. Cheers!
Thanks for pointing out the typos. Much appreciated.