In our previous tutorial, I have showed you how to setup and configure a basic FTP server using VSFTPD in Ubuntu 16.04 LTS server. If you haven't setup VSFTPD server, check the following link.
VSFTPD is not secure by default. We have to do a couple of things to make the FTP server bit secure. In this tutorial, let me show you how to secure VSFTPD server with TLS/SSL encryption.
Table of Contents
Prerequisites
Make sure you have installed and configured VSFTPD as I mentioned in the previous tutorial. The link of that tutorial is given above.
After installing and configuring we need to assign root ownership to the ftp user home directory. Remember, I have created a ftp user called "test" in the previous tutorial.
So, let us assign root ownership to the "test" user's home directory - /home/test/.
To do so, run:
sudo chown root:root /home/test/
Then, create a separate directory within /home/test/ directory to store the test user's files.
Let us call it as "ostechnix".
sudo mkdir /home/test/ostechnix
And then, assign test user's ownership to the above created directory.
sudo chown test:test /home/test/ostechnix/
We have completed the prerequisites. You can able to upload and download to /home/test/ostechnix/ directory. But remember, we didn't make our FTP server secure yet.
Let us go ahead and configure VSFTPD with SSL to secure our FTP server.
Configuring VSFTPD with TLS/SSL connection
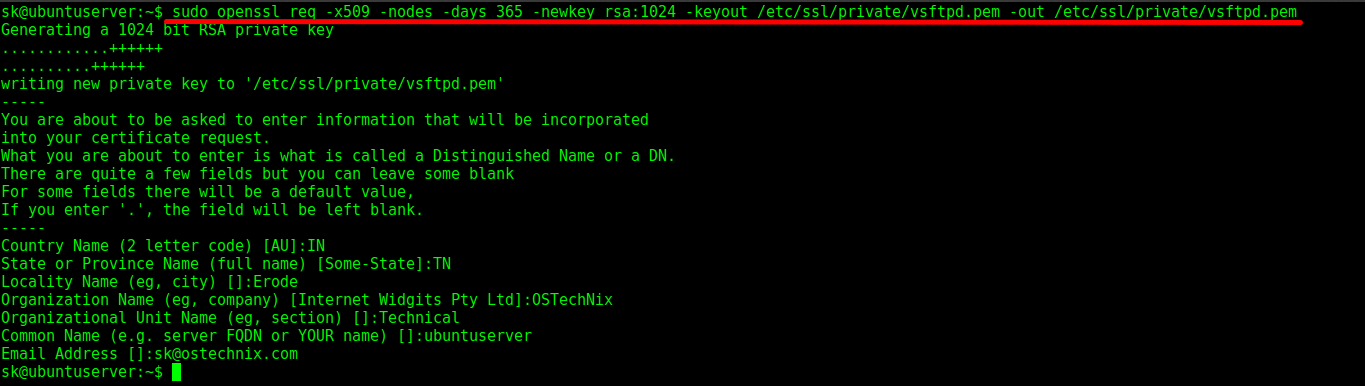
First let us create the required SSL certificates to use with VSFTPD. To do so, run the following command from the Terminal:
sudo openssl req -x509 -nodes -days 365 -newkey rsa:1024 -keyout /etc/ssl/private/vsftpd.pem -out /etc/ssl/private/vsftpd.pem
Enter the required values.
Sample output:
Generating a 1024 bit RSA private key
............++++++
..........++++++
writing new private key to '/etc/ssl/private/vsftpd.pem'
-----
You are about to be asked to enter information that will be incorporated
into your certificate request.
What you are about to enter is what is called a Distinguished Name or a DN.
There are quite a few fields but you can leave some blank
For some fields there will be a default value,
If you enter '.', the field will be left blank.
-----
Country Name (2 letter code) [AU]:IN
State or Province Name (full name) [Some-State]:TN
Locality Name (eg, city) []:Erode
Organization Name (eg, company) [Internet Widgits Pty Ltd]:OSTechNix
Organizational Unit Name (eg, section) []:Technical
Common Name (e.g. server FQDN or YOUR name) []:ubuntuserver
Email Address []:sk@ostechnix.com
SSL certificate creation
The above command will create the required SSL certificates and store them in /etc/ssl/private/ directory. These certificates is valid up to 365 days.
Now, add the created SSL certificates to vsftpd configuration file.
To do so, edit vsftpd configuration file:
sudo nano /etc/vsftpd.conf
Find the following lines:
rsa_cert_file=/etc/ssl/certs/ssl-cert-snakeoil.pem
rsa_private_key_file=/etc/ssl/private/ssl-cert-snakeoil.key
And, replace the certificate and key paths with correct path as created above.
[...]
rsa_cert_file=/etc/ssl/private/vsftpd.pem
rsa_private_key_file=/etc/ssl/private/vsftpd.pem
[...]
And, edit or add the following lines to force vsftpd server to use SSL and TLS encryption.
ssl_enable=YES
allow_anon_ssl=NO
force_local_data_ssl=YES
force_local_logins_ssl=YES

ssl_tlsv1=YES
ssl_sslv2=NO
ssl_sslv3=NO

require_ssl_reuse=NO
ssl_ciphers=HIGH
After modifying the values, the vsftpd configuration file should look like this:

vsftpd configuration
Save and close the file.
Finally, restart the vsftpd service to take effect the changes.
sudo systemctl restart vsftpd
Or
sudo service vsftpd restart
VSFTPD configuration with SSL is over. Let us test the secure FTP server using FileZilla.
Test VSFTPD server using FileZilla
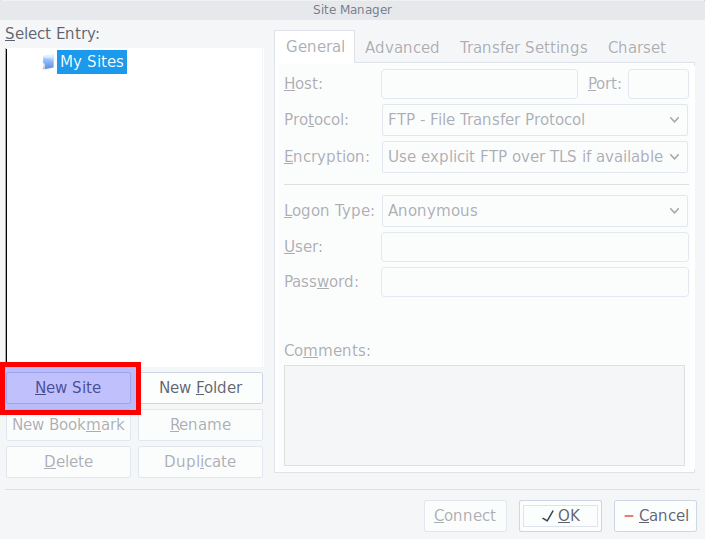
Open FileZilla either from Menu or Unity. Go to File -> Site Manager from FileZilla.
The site manager screen should look like below. Click New site.
FileZilla Site Manager
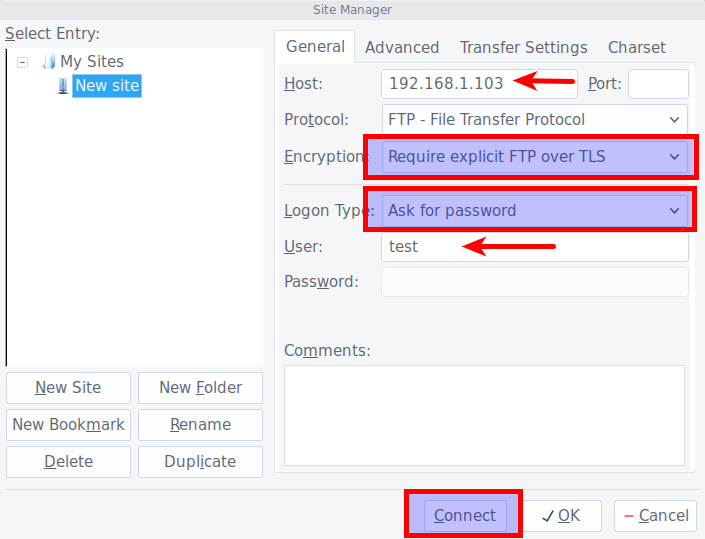
Enter the FTP server IP address or hostname in the Host field. Select "Require explicit FTP over SSL" from the Encryption drop down box. Then, select "Ask for password" option from the logon type column. Then, Enter the FTP user name. Finally, click Connect.
Connect to FTP server with TLS/SSL
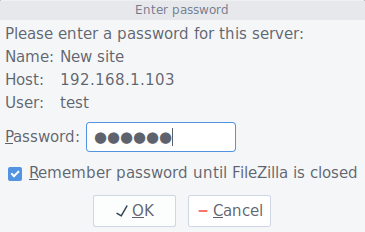
In the next screen, you will be asked to enter the ftp user's password, and click OK.
Enter FTP user's password
Examine the certificate values. If everything seems correct, click OK to continue.

Verify SSL certificate
Bingo! Now, you should be connected with your VSFTPD server with TLS/SSL encryption.

VSFTPD server with TLS/SSL encryption
Now, our VSFTPD server is secured and ready to use.
That's all. If you find guide useful, please share it on your social networks and support OSTechNix.
Happy weekend!
Cheers!!