Today let us discuss how to create custom Ubuntu live cd image (ISO). We already have done this using Pinguy Builder. But, Pinguy development seems to be discontinued now. I don't see any updates lately from the Pinguy builder official site. Fortunately, I found an alternative tool to create Ubuntu live cd images. Meet Cubic, stands for Custom Ubuntu ISO Creator, a GUI application to create a customized bootable Ubuntu Live CD (ISO) image.
Cubic is being actively developed and it offers many options to easily create a customized Ubuntu live cd. It has an integrated command-line chroot environment where you can do all customization, such as installing new packages, Kernels, adding more background wallpapers, adding additional files and folders. It has an intuitive GUI interface that allows effortless navigation (back and forth with a mouse click) during the live image creation process. You can create a new custom image using the ISO or modify existing projects. Since it is used to make Ubuntu live images, I believe it can be used in other Ubuntu flavours and derivatives such as Linux Mint.
Table of Contents
Install Cubic in Ubuntu
Cubic developer has made a PPA to ease the installation process.
To install Cubic on Ubuntu 18.04 and newer versions, run the following commands one by one in your Terminal:
$ sudo apt-add-repository ppa:cubic-wizard/ release
$ sudo apt-key adv --keyserver keyserver.ubuntu. com --recv-keys B7579F80E494ED3 406A59DF9081525 E2B4F1283B
$ sudo apt update
$ sudo apt install cubic
"Cubic Classic" works on Ubuntu 14.04.6 LTS Trusty Tahr and Ubuntu 16.04.6 LTS Xenial Xerus. To install Cubic Classic on your Ubuntu system, run:
$ sudo apt-add-repository ppa:cubic-wizard/ classic
$ sudo apt-key adv --keyserver keyserver.ubuntu. com --recv-keys B7579F80E494ED3 406A59DF9081525 E2B4F1283B
$ sudo apt update
$ sudo apt install cubic
Create Custom Ubuntu Live Cd Image Using Cubic
Once installed, launch Cubic from application menu or dock. This is how Cubic looks like in my Ubuntu 16.04 LTS desktop system.
Choose a directory for your new project. It is the directory where your files will be saved.
Please note that Cubic will not create a live cd of your system. Instead it just creates a custom live cd from an Ubuntu installation cd. So, you should have a latest ISO image in hand.
Choose the path where you have stored your Ubuntu installation ISO image. Cubic will automatically fill out all details of your custom OS. You can change the details if you want. Click Next to continue.
Next, the compressed Linux file system from the source installation medium will be extracted to your project's directory (i.e /home/ostechnix/custom_ubuntu in our case).
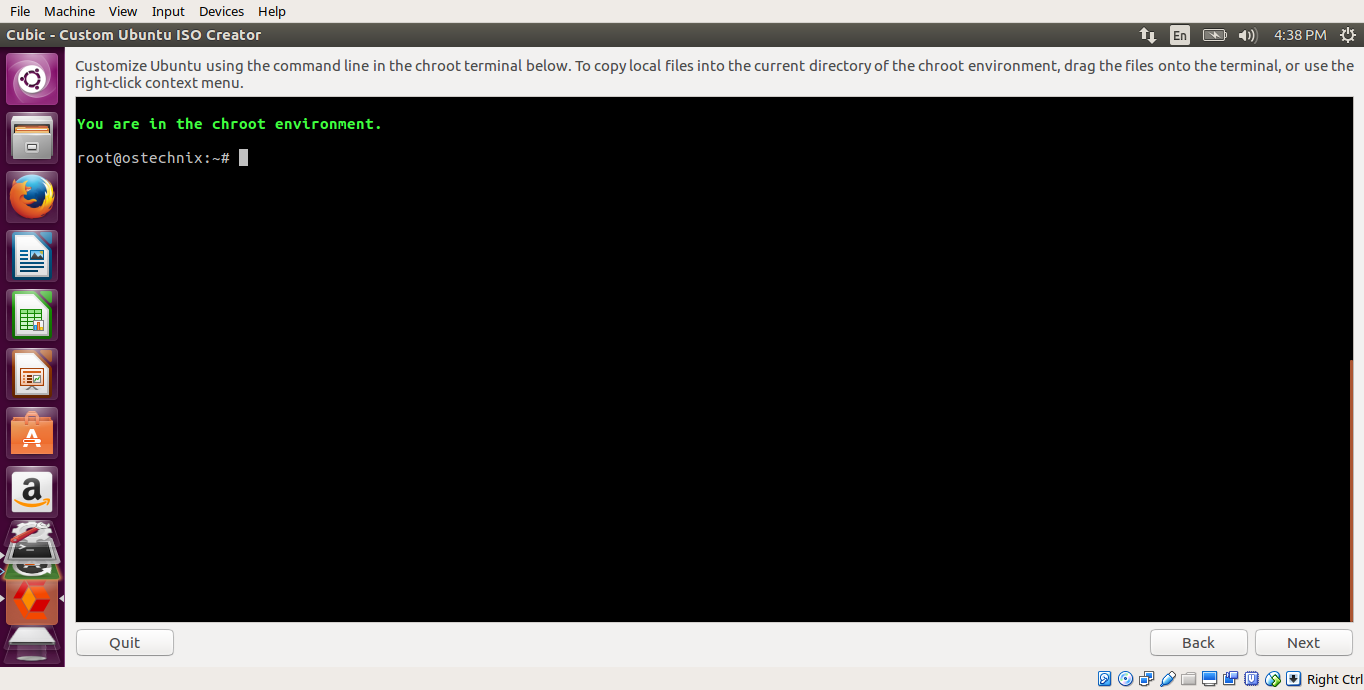
Once the file system extracted, you will be landed to chroot environment automatically. If you don't see Terminal prompt, press the ENTER key few times.
From here you can install any additional packages, add background images, add software sources repositories list, add latest Linux kernel to your live cd and all other customization.
For example, I want vim installed in my live cd, so I am going to install it now.
We don't need to "sudo", because we are already in root environment.
Similarly, install any additional Linux Kernel version if you want.
apt install linux-image-extra-4.10.0-24-generic
Also, you can update software sources list (Add or remove repositories list):
After modifying the sources list, don't forget to run "apt update" command to update the sources list:
apt update
Also, you can add files or folders to the live cd. Copy the files/folders (right click on them and choose copy or CTRL+C) and right click in the Terminal (inside Cubic window), choose Paste file(s) and finally click Copy in the bottom corner of the Cubic wizard.
Note for Ubuntu 17.10 users:
In Ubuntu 17.10 system, the DNS lookup may not work in chroot environment. If you are making a custom Ubuntu 17.10 live image, you need to point the correct file resolve.conf file:
ln -sr /run/systemd/resolve/resolv.conf /run/systemd/resolve/stub-resolv.conf
To verify DNS resolution works, run:
cat /etc/resolv.conf
ping google.com
Add your own wallpapers if you want. To do so, go to the /usr/share/backgrounds/ directory,
cd /usr/share/backgrounds
and drag/drop the images into the Cubic window. Or copy the images and right click on Cubic Terminal window and choose Paste file(s) option. Also, make sure you have added the new wallpapers in an XML file under /usr/share/gnome-background-properties, so you can choose the newly added image Change Desktop Background dialog when you right-click on your desktop. After you made all changes, click Next in Cubic wizard.
In the next screen, choose Linux Kernel version to use when booting into the new live ISO. If you have installed any additional kernels, they will also listed in this section. Just choose the Kernel you'd like to use in your live cd.
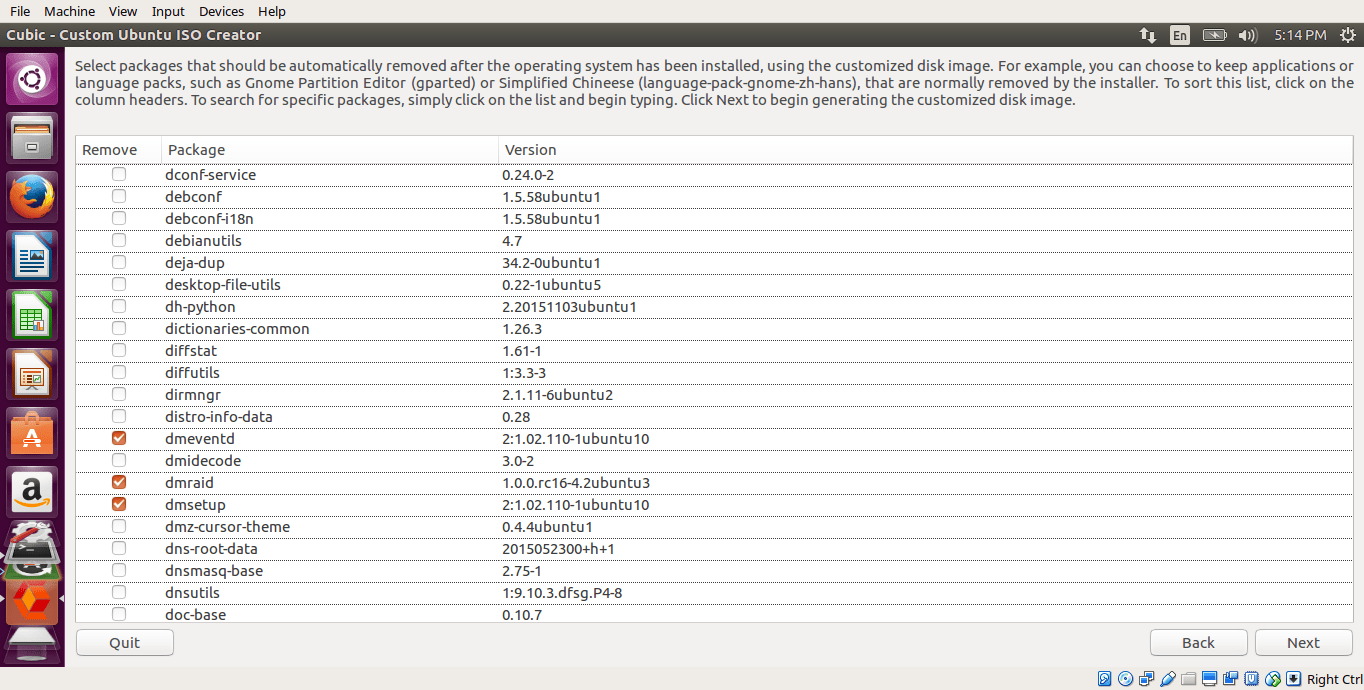
In the next section, select the packages that you want to remove from your live image. The selected packages will be automatically removed after the Ubuntu OS has been installed using the custom live image. Please be careful while choosing the packages to remove, you might have unknowingly removed a package that depends on another package.
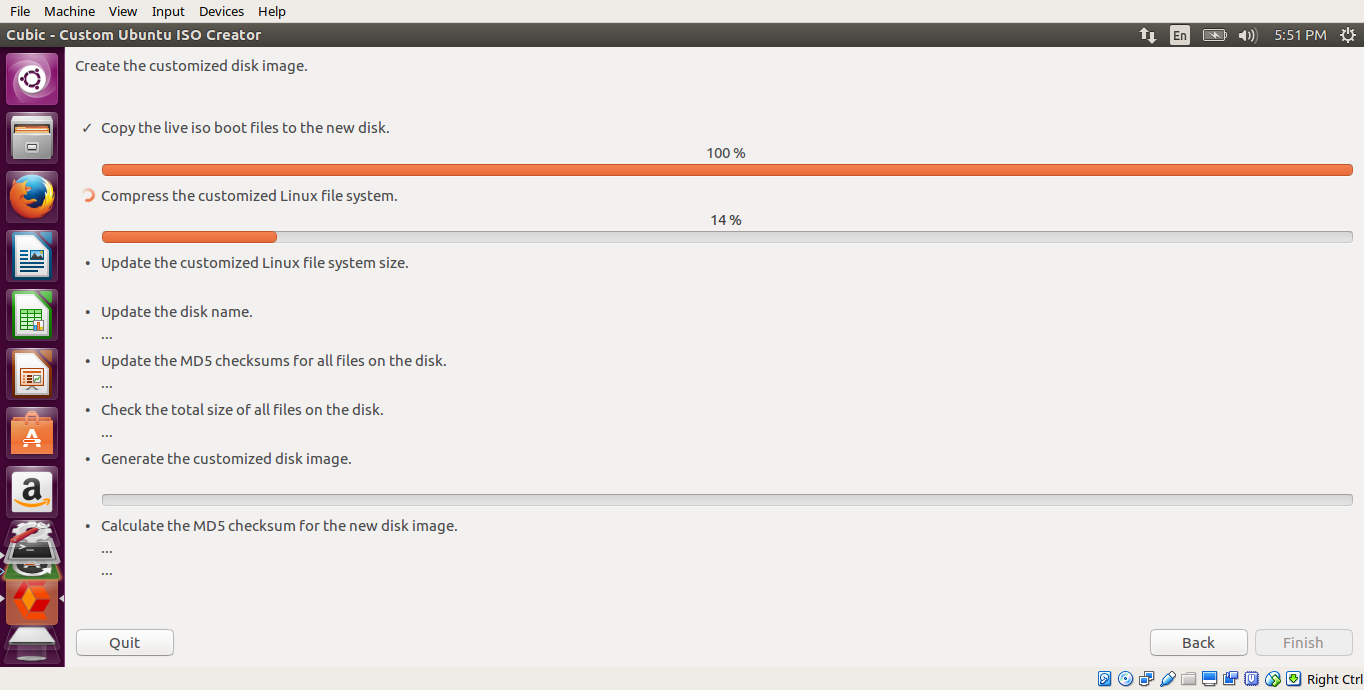
Now, the live image creation process will start. It will take some time depending upon your system's specifications.
Once the image creation process completed, click Finish. Cubic will display the newly created custom image details.
If you want to modify the newly create custom live image in the future, uncheck the option that says "Delete all project files, except the generated disk image and the corresponding MD5 checksum file". Cubic will left the custom image in the project's working directory, you can make any changes in future. You don't have start all over again.
To create a new live image for different Ubuntu versions, use a different project directory.
Modify Custom Ubuntu Live Cd Image Using Cubic
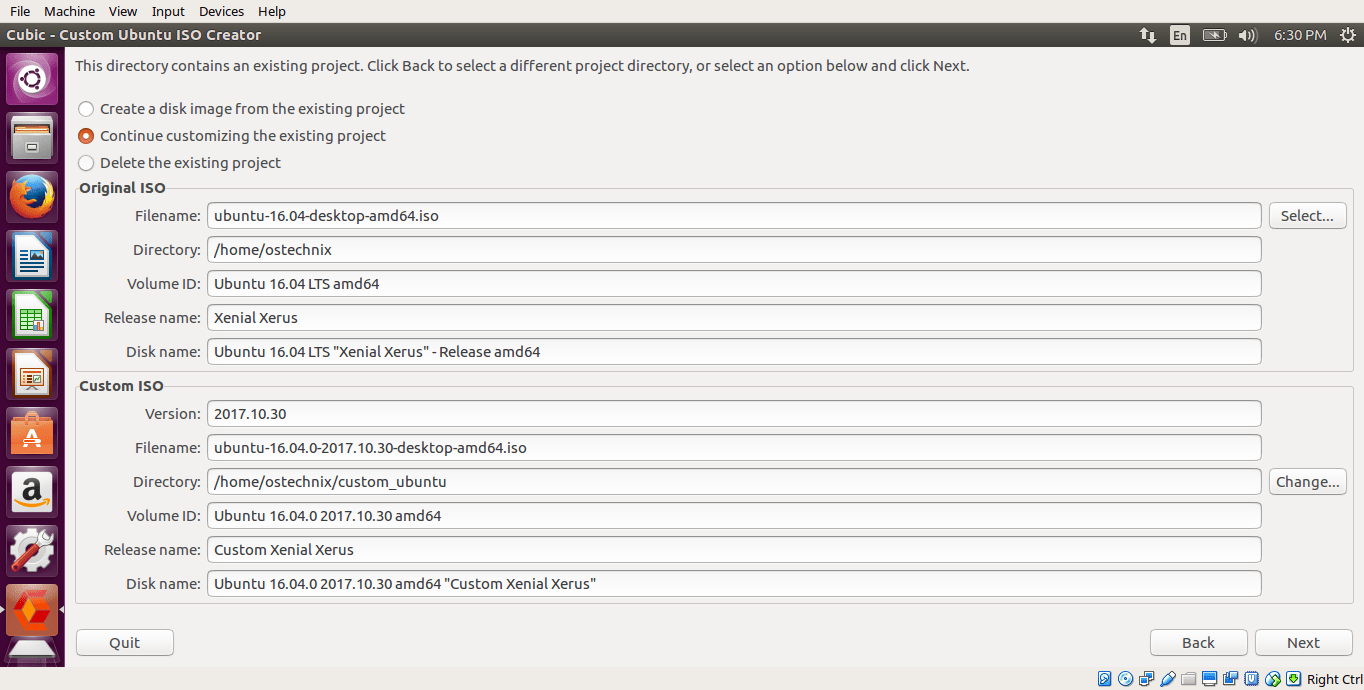
Launch Cubic from menu, and select an existing project directory. Click the Next button, and you will see the following three options:
- Create a disk image from the existing project.
- Continue customizing the existing project.
- Delete the existing project.
The first option will allow you to create a new live ISO image from your existing project using the same customization you previously made. If you lost your ISO image, you can use the first option to create a new one.
The second option allows you to make any additional changes in your existing project. If you choose this option, you will be landed into chroot environment again. You can add new files or folders, install any new software, remove any software, add other Linux kernels, add desktop backgrounds and so on.
The third option will delete the existing project, so you can start all over from the beginning. Please that this option will delete all files including the newly generated ISO.
I made a custom Ubuntu 16.04 LTS desktop live cd using Cubic. It worked just fine as described here. If you want to create an Ubuntu live cd, Cubic might be good choice.
When you try the Live OS loaded in a CD or USB drive, you can do all sort of things, such as installing applications, downloading files, playing media, creating files and folders, customizing it as per your liking and a lot more. However once you reboot the system, all of the said changes will be lost. Because, you are working on a live OS. That's how it works. What if you want to make all changes remain intact even after rebooted the system? Np problem, read the following guide to create a persistent live USB with Ubuntu.
Resources:
Thanks for stopping by!
Help us to help you:
- Subscribe to our Email Newsletter : Sign Up Now
- Support OSTechNix : Donate Via PayPal
- Download free E-Books and Videos : OSTechNix on TradePub
- Connect with us: Reddit | Facebook | Twitter | LinkedIn | RSS feeds
Have a Good day!!


11 comments
What a great post! I transitioned fulltime to Linux a little over a year ago. Pretty comfortable with it but haven’t had any interest in the inner workings. Cubic changes this. The write-up along with the link to Pinguy Builder both appear like great tools to get under the hood. Can’t wait to get started and experimenting.
Seems good. Will it only create a LiveCD, or also the installation image ?
As far as I tested, It can create LiveCD only.
Thanks to the terrific guide
in 18.04 , there`s no “/run/systemd/resolve/resolv.conf” to make link , any suggestions ??
A solution I found somwhere else to this was to type out:
ln -sfn ../run/resolvconf/resolv.conf /etc/resolv.conf
at the chroot part. Link:
https://bugs.launchpad.net/cubic/+bug/1723568
Can it create ONLY Ubuntu Live CD images or can it create others such as Kubuntu.
I ask because I’ve previously trued UCK and it would only create Ubuntu Live CD’s and even then, it would not work.
I messed around with Cubic on Ubuntu 18.04, but every time it got to compressing the files after the chroot part, it pushed all 8 cores of my 4.0 GHz CPU to 100% and pinned the CPU at 90 degrees C, causing the computer to shutdown every time. I took apart my computer, recabled everything, blew out all the dust, cleaned all the filters, moved stuff around to maximize airflow, replaced a few fans, and then took off my CPU cooler, cleaned all the thermal compound off and reaatached it. Checked that all the fans were fine, physically felt that there was TONS of airflow, and turned off the “eco mode” of my PSu and cranked all the fans to full (that were controlable) in the UEFI. Tried to delete the old files and start over, used different .iso files, made fewere changes, no changes, etc. Still had the same issue. Did anybody else have this occur?
Alternatively, if you don’t want to go through all that process but still want an ISO image, you can try linuxcustomizer.com, it’s free!
I have followed your Guide and got 6 files including ubuntu-16.04.6-2019.11.29-desktop-amd64.iso, custom-live-iso, squashfs-root, cubic.conf, ubuntu-16.04.6-2019.11.29-desktop-amd64.md5
But I am not sure how to make a DVD/USB LIVE with these files… Should I burn .iso file to USB/DVD ?
I don’t know if this is specific to eOS, but the app is so broken I can’t pass the first step, cause the project folder picker is not working.